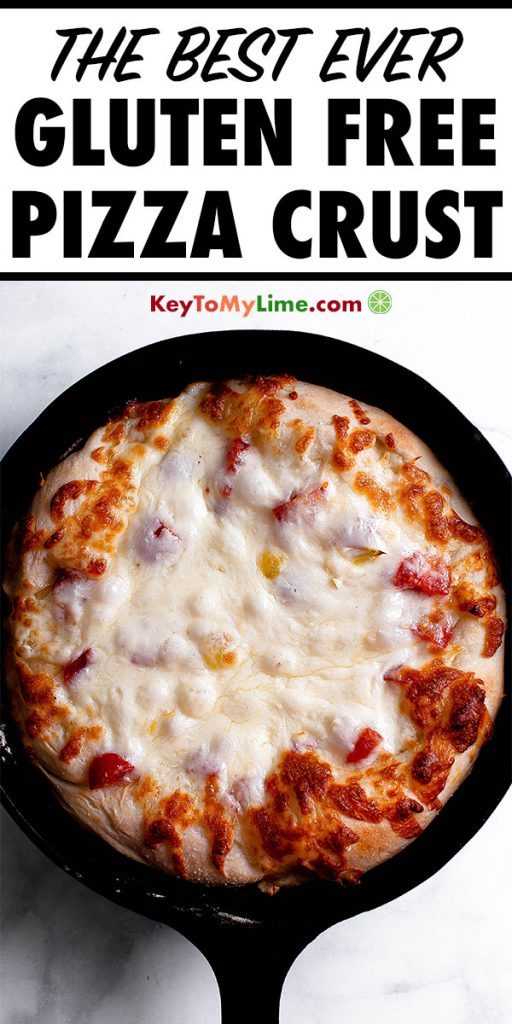
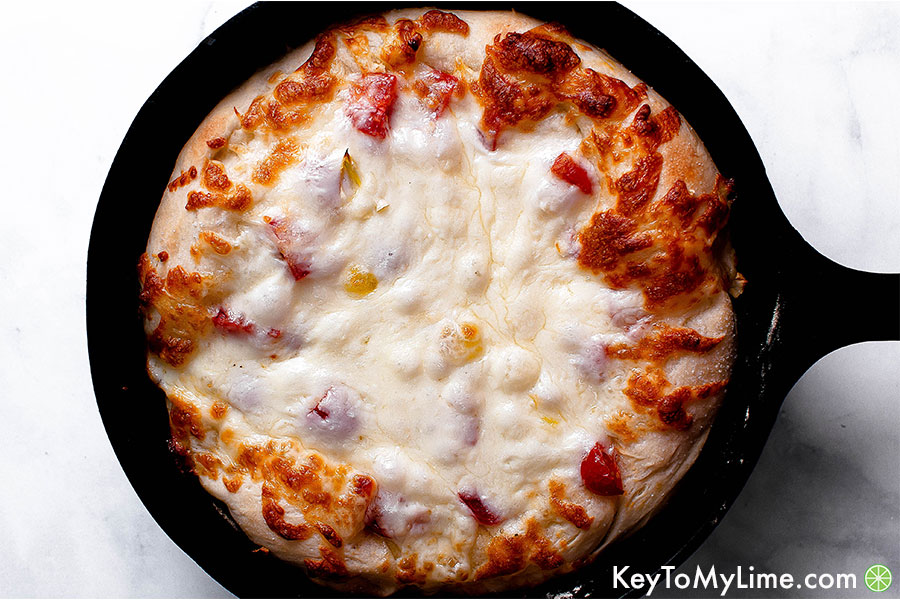
This is the BEST gluten free pizza crust recipe ever! It’s so delicious – nobody will know that it’s gluten free pizza dough! It’s chewy and stretchy like regular pizza dough.
Here’s the story behind how I ended up making the best gluten free pizza crust recipe.
A couple of years ago, my husband had to eat gluten free for a while. I joined him, and everything was great…until Friday night rolled around (AKA pizza night).
We tried frozen pizzas, and they tasted like cardboard – ick! I knew that homemade crust was going to be the only way to truly enjoy our newly gluten free pizza nights.
I tried so many different recipes and combinations and finally came up with the best gluten free pizza dough recipe ever!
It’s doughy, stretchy, chewy, has a crispy exterior, and has an amazing flavor profile.
How to make gluten free pizza dough without eggs:
This recipe doesn’t require eggs. It uses the binding powers of tapioca starch, xantham gum, and psyllium husk to hold it together.
Even though it holds together very well, it still is a gluten free dough and you’ll get the best results if you handle it gently.
Want to make an amazing vegan gluten free pizza?
This recipe is vegan as it’s written. Try topping it with this incredible mozzarella cashew cheese recipe!
What you’ll need:
You’ll need two things for this recipe to turn out well.
The first is high quality gluten free flours. I recommend this brand for this recipe. All of their gluten free flours are amazing. The quality of the flour goes a long way in this recipe.
The second is a good quality baking sheet. This is the sheet I recommend using. It’s an affordable and versatile baking sheet that will work perfectly for everything from cookies to pizza.
Finally, something that’s not necessary but is nice to have, is a silicone baking mat. It gives the dough a nice crispy bottom and helps prevent it from sticking to the baking sheet.
Try using this gluten free pizza dough with any of my pizza recipes!
Best Gluten Free Pizza Crust Recipe
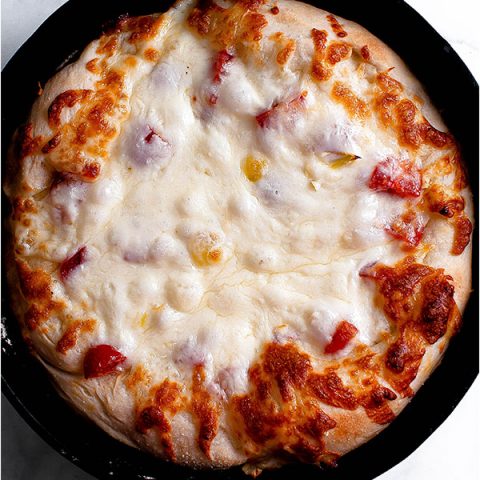
The BEST gluten free pizza crust recipe ever! It's so delicious - nobody will know that it's gluten free! It's chewy and stretchy like regular pizza dough.
Ingredients
- 3/4 cup hot water
- 2 1/4 teaspoons active dry yeast (one 1/4 ounce packet)
- 1 Tablespoon granulated sugar
- 3/4 cup tapioca starch
- 1/2 cup white rice flour
- 1/3 cup soy flour
- 1/3 cup certified gluten free oat flour
- 1 teaspoon xantham gum
- 1 teaspoon fine sea salt
- 2 Tablespoons psyllium husk
- 3 Tablespoons olive oil (divided)
- Cornmeal (optional, to dust the pan)
Instructions
- In a small bowl, mix together the hot water (it should be hot but not boiling and should register between 105 F and 115 F on a candy thermometer), sugar, and yeast. Allow to rest for 5-10 minutes, or until the yeast has activated. You’ll know the yeast is ready when it’s created a noticeable foamy layer on top. I normally use the hottest water I can get from the tap.
- In a large bowl, whisk together the tapioca starch, white rice flour, soy flour, oat flour, xantham gum, fine sea salt, and psyllium husk.
- Add the yeast mixture and 2 Tablespoons olive oil to the flour mixture. Using a fork, mix the ingredients together until you can’t mix with the fork anymore. If it feels too dry, you can add a little warm water 1 Tablespoon at a time. You want it to be able to hold together when you squeeze it, but you don’t want it to be a wet dough. At that point, turn the mixture over onto a floured surface, coat your hands with flour, and knead the dough. You can use a stand mixer on low speed with a dough hook to make the dough, but a handheld electric mixer won’t be strong enough. You could also use a bread machine on the dough setting, but I find that this over kneads it and causes it to collapse on itself (it will still be delicious, but not quite as good).
- To knead the dough by hand, use the heel of your hand to push the top half of the dough away from you to make it stretch. Then you’ll rotate the dough 45 degrees and fold it in half onto itself. Continue doing this for a few minutes. Gluten free dough is a bit tricky because you don’t want to over mix or over knead it. Go with your instinct on when to stop - as soon as it feels stretchy enough to be able to form into a crust, I would stop.
- Cut the ball of dough in half, and coat each dough ball in half of the remaining olive oil. Place in a bowl, cover with a clean kitchen towel, and allow to rise for 30 minutes, or until each dough ball is roughly 10” in diameter. If your dough feels sticky, you can oil the inside of the bowl to prevent it from sticking to the bowl. If you have a very large bowl, you could put both in the same bowl, but I find I get the best results when I put them in separate bowls.
- While the dough is rising, preheat the oven to 450 F for at least 30 (but preferably 45) minutes.
- Carefully stretch one ball of dough out into your desired thickness and shape. I stretch the dough by oiling my fingers and carefully stretching each ball out a little at at a time until it's about 9" across. I aim to have the middle be about 1/4" thick and the edges be about 1/2" thick. Place onto a baking sheet that you’ve either lightly coated with oil or cornmeal (either will prevent the dough from sticking to the pan). Loosely cover with plastic wrap or a clean towel and let it rise in a warm place for 20 minutes. Bake for 5 to 10 minutes, or until the top has puffed and is somewhat firm, and the underside is crispy (in my oven this takes 8 minutes).
- Top with your toppings of choice, bake for 3 minutes (or until the toppings are hot), and finish by broiling for 30 seconds to 1 minute (depending on the strength of your broiler). I find that I get the best results when I cook the toppings ahead of time in a skillet. In order to get the right texture, this dough really has to bake without toppings first, making it easy to overcook the pizza if you’re trying to cook it long enough to cook the toppings.
- Repeat with the second ball of dough.
Notes
Use only certified gluten free flours and ingredients to keep this recipe safe for gluten free people. Additionally, be careful of any cross contamination that could occur through shared cooking utensils, etc.
Crusts can be made ahead and frozen. Complete all steps except for the topping and second baking. Allow the crusts to cool completely before freezing. Wrap in plastic wrap and freeze for up to one month. Defrost in a 350 F for 4 to 5 minutes, or until it’s heated through, before topping.
Nutrition Information:
Yield:
8Serving Size:
1/4 10" pizzaAmount Per Serving: Calories: 168Total Fat: 6.3gCarbohydrates: 25.4gFiber: 2.6gSugar: 1.9gProtein: 3g
Nutrition information isn’t always accurate.
Please let me know what you think of this recipe in the comments and on Instagram! @keytomylime #keytomylime
Be sure to pin this recipe for later!
Want to learn more about gluten free flours? Schaer has a great guide outlining the top 12 gluten free flours.

10 thoughts on “The Best Gluten Free Pizza Crust Recipe”
Hello,
What can be used in place of soy flour?
I cannot have soy.
Thank you
Hi Jacqueline,
You could replace the soy flour with almond flour (1:1). If you can’t have almond flour, you could also use coconut flour. If you use coconut flour, you’d have to use half as much soy flour as the recipe calls for. In terms of taste, I’d recommend the almond flour over the soy flour. Hope that helps!
-Alexa
I tried this recipe last night and it was tasty, but didn’t come out looking like your picture. You’ve said to stretch to the desired thickness and shape, but I think I stretched it too thin. Out of curiosity, how thick did you stretch your dough before baking? Thank you!
Hi Jaya,
Thanks for reaching out! I’m happy to hear you liked the taste. I normally stretch the dough by oiling my fingers and carefully stretching each ball out a little at at a time until it’s about 9″ across. I aim to have the middle be about 1/4″ thick and the edges be about 1/2″ thick. Hope that helps!
-Alexa
Thank you!! I’m going to try this recipe again tonight so will follow this advice.
Hi Jaya, That’s great! I know gluten free dough can be super challenging to work with. I’ve even rolled out the dough with a rolling pin between two sheets of parchment paper on days that I didn’t feel like hand stretching it. You don’t get as much of an edge crust that way, but it still works and tastes great. -Alexa
What are the brands of flours you like to use? That link goes to a hand mixer.
Thanks!
Hi Allison, So sorry about that, but thanks for letting me know! For individual gluten free flours I use Bob’s Red Mill flours (but I use Pamela’s whenever I use a 1:1 gluten free flour blend). -Alexa
Looks really yummy but I can’t have yeast. Do you know of any alternatives that could work?
Hi Mary, Thanks so much! This recipe really needs yeast. I would use a crust that uses baking powder as the leavener. I have two recipes (that aren’t posted yet) that use baking powder. One uses a gluten free flour blend, plain yogurt, and baking powder (it has more of a buttermilk biscuit flavor). The other uses tapioca starch and is chewier, but so delicious. If either of those sound like something you’d be interested in, please let me know and I’ll happily share the recipe! -Alexa